
How to add clients and keep their records
Add clients, keep their details and notes, and find them again.
Updated 16 November 2026
Part 1 Add a client
Step 1 Start a new client
Go to Clients and click Add client.
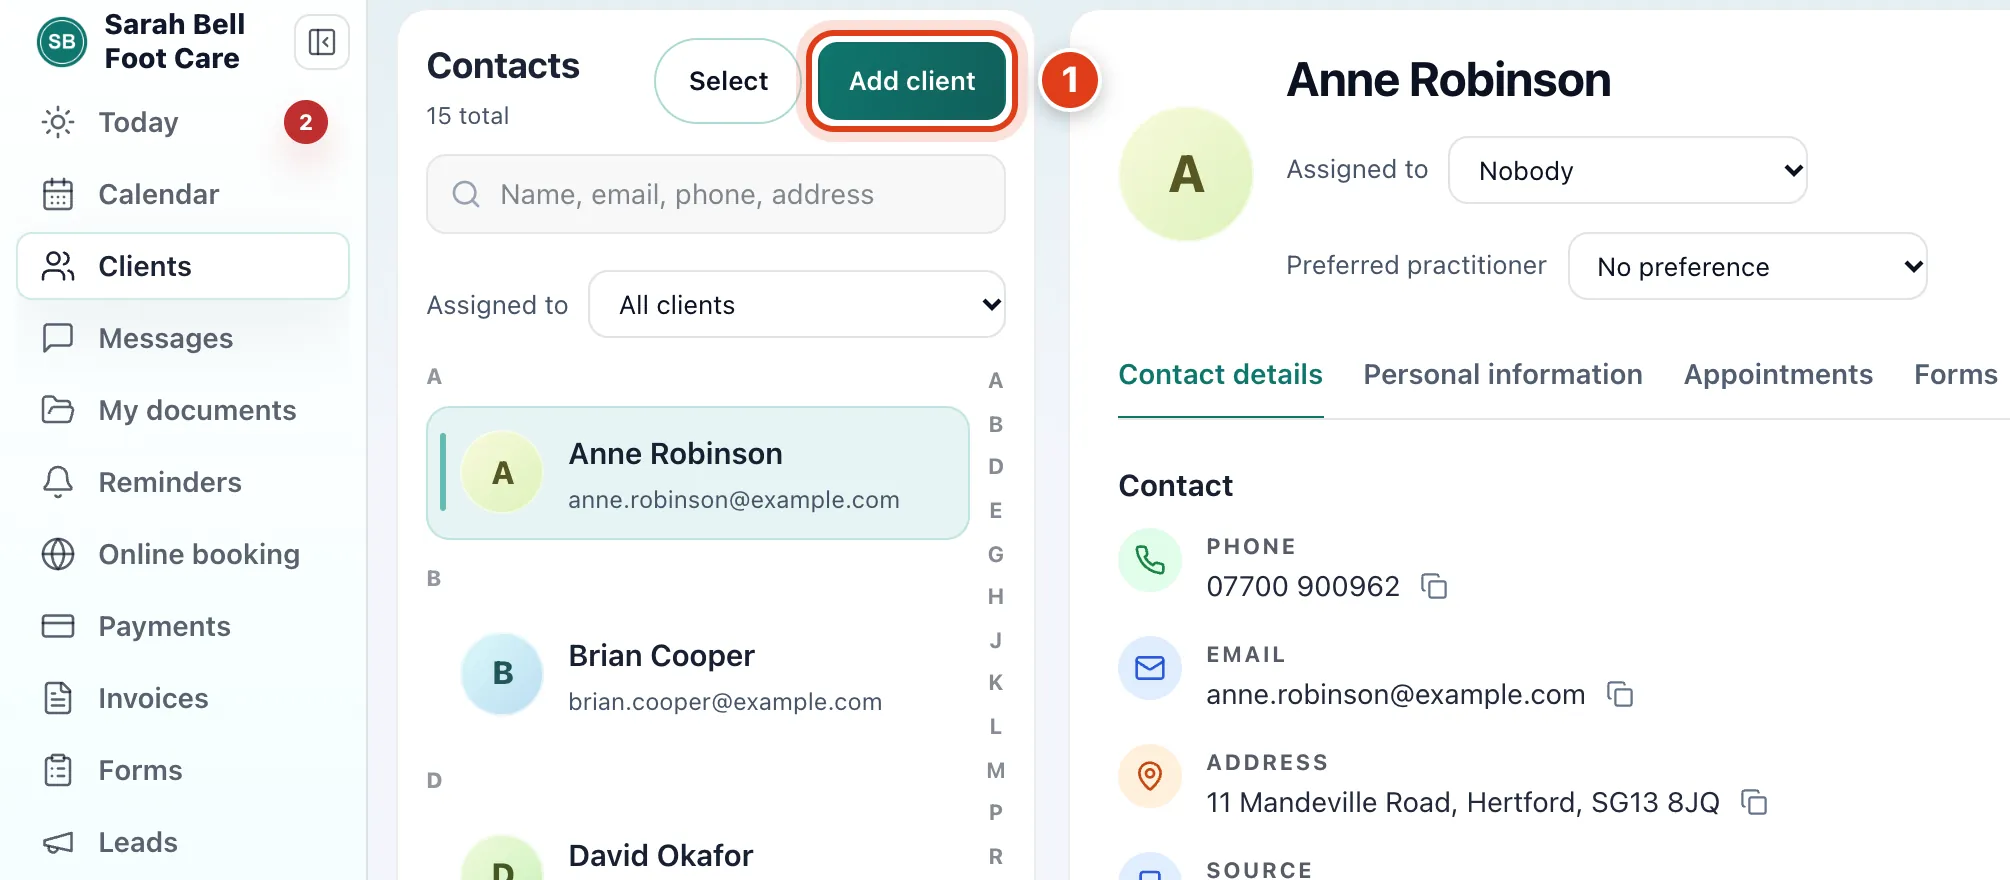
- Add client is only needed for clients who don't book online: online bookers are added for you, with Source Online booking, unless their name and email or mobile match a client you have.
Step 2 Add how to reach them and where they live
Only Full name is needed at the top, plus Postcode once you type any address or visit note.
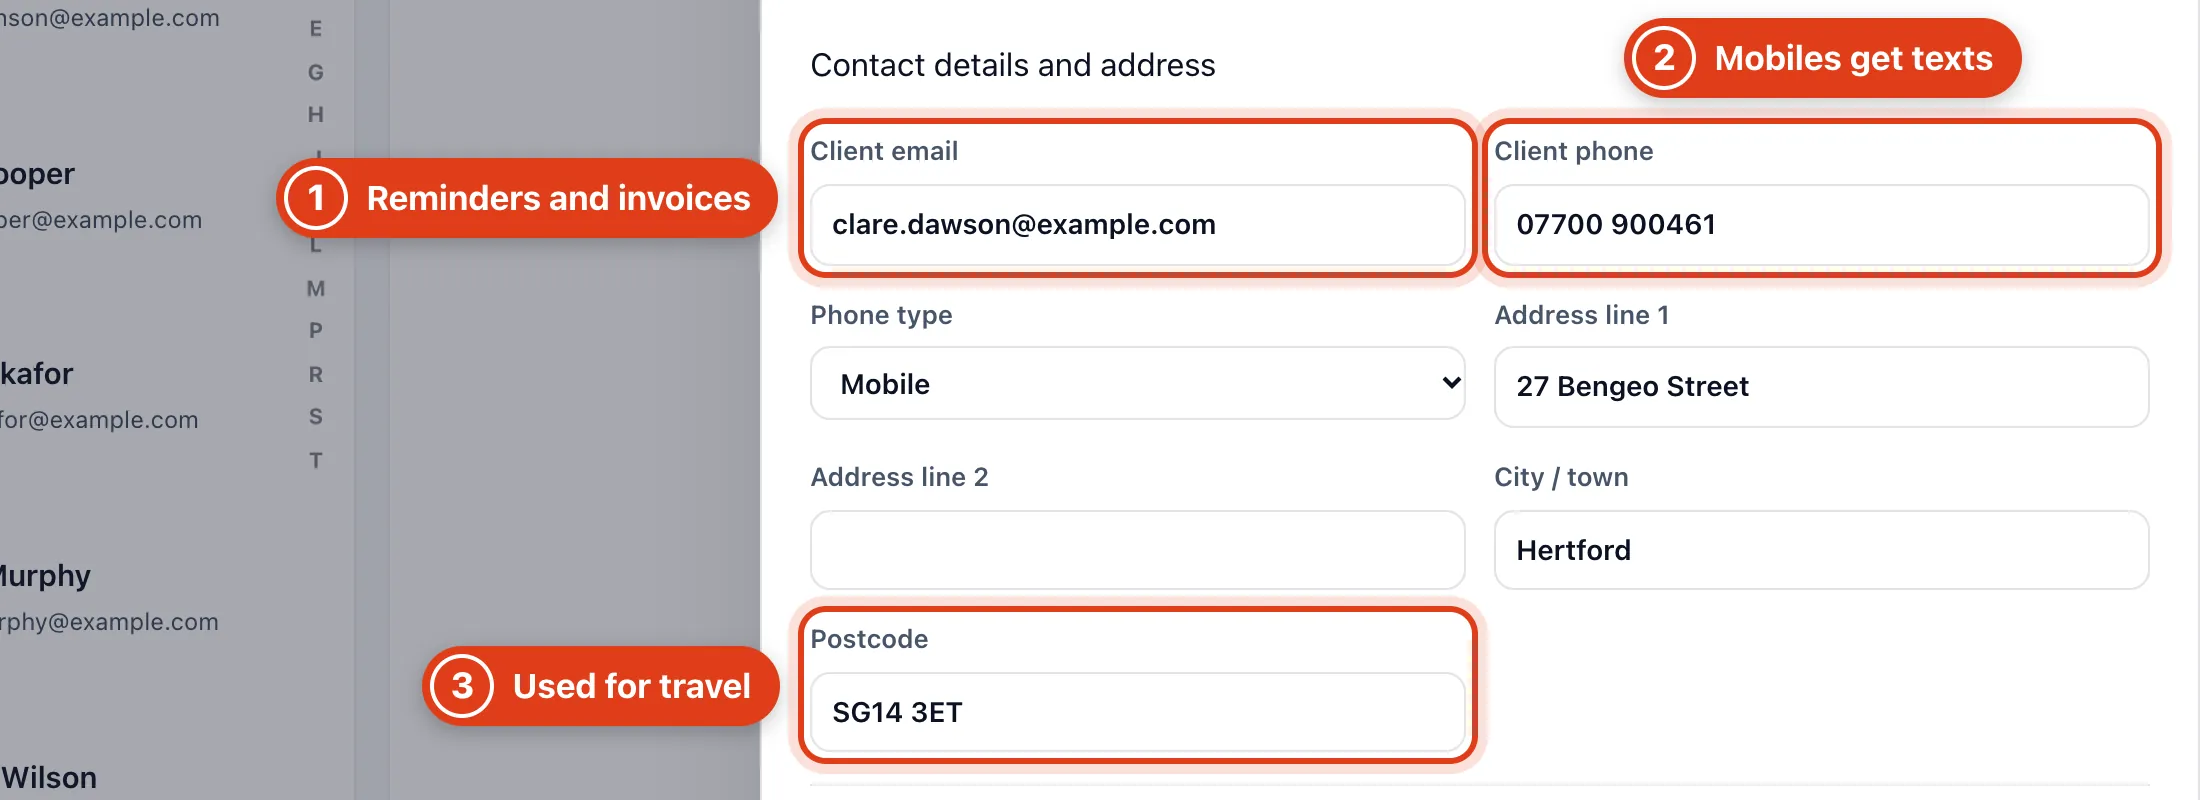
- Client email gets their email reminders and invoices, and lets them sign in to their Client Hub.
- Client phone: text reminders go only to mobiles such as 07700 900461; for a landline, such as an 01992 number, the reminder becomes a manual one for you to do.
- Postcode places the client on the map for suggested times and travel, so a UK postcode must be real to save.
Step 3 Add how to get in
Notes below shows on their page as Client note; clients never see it.
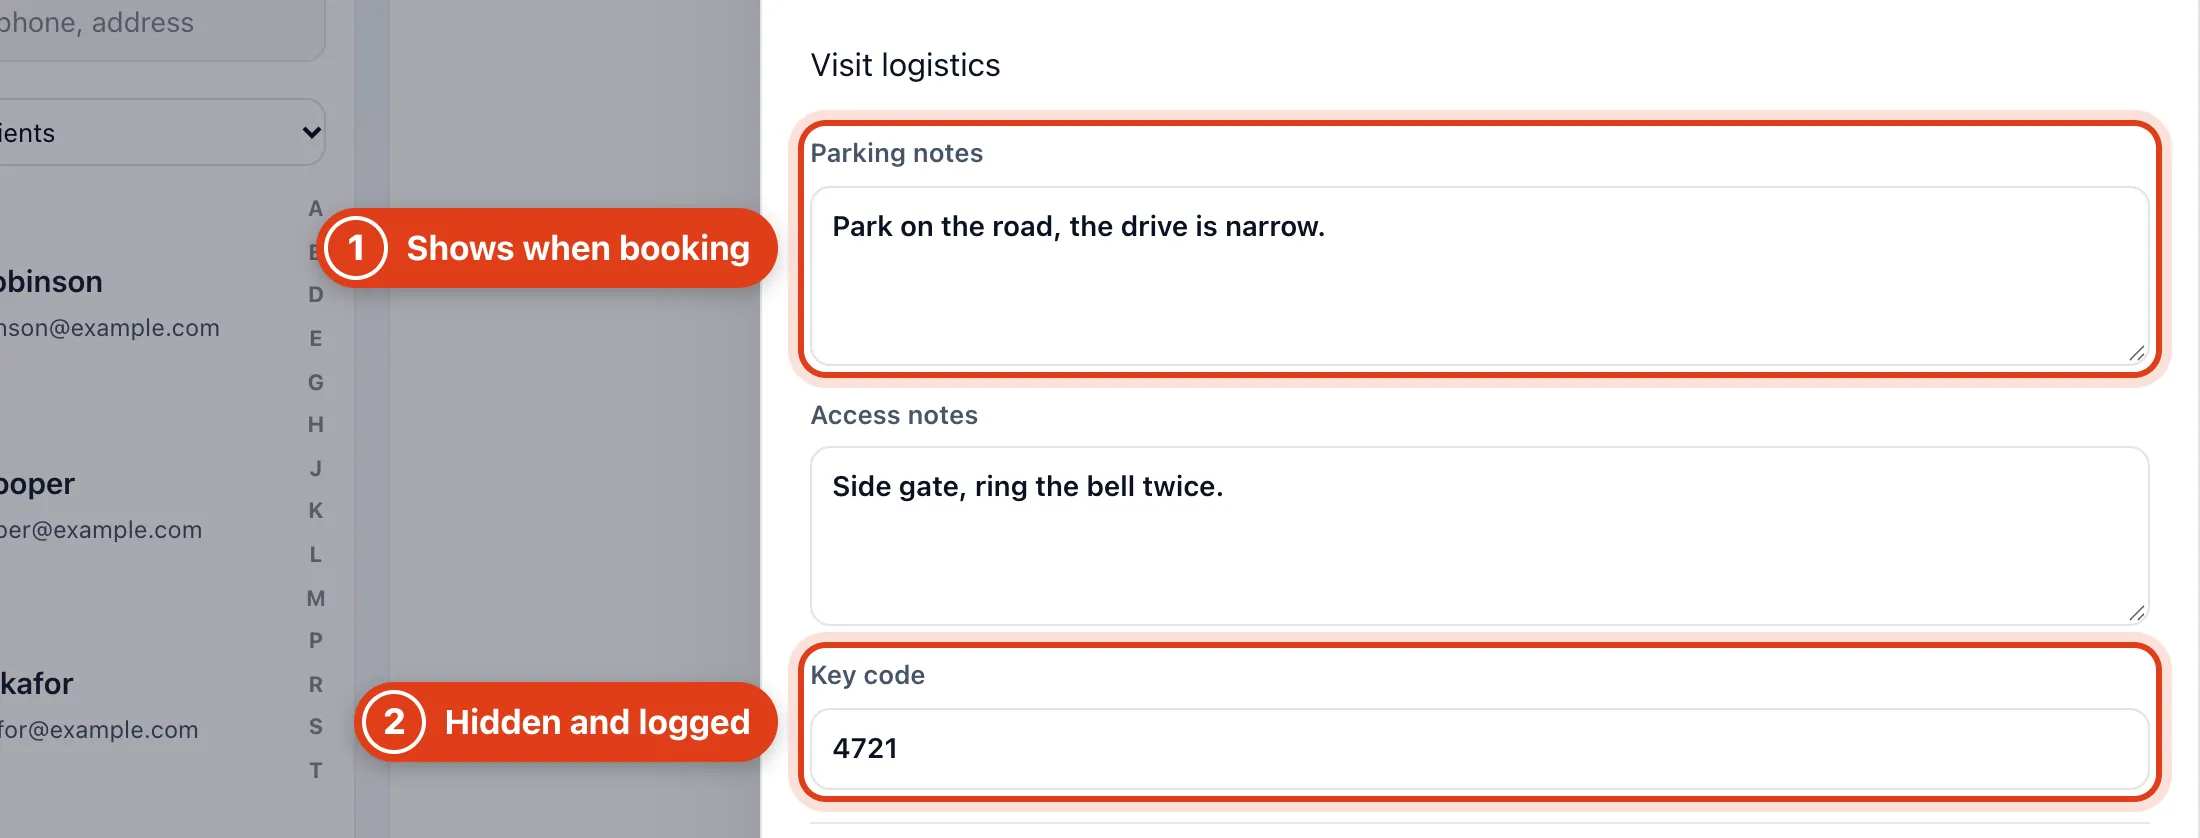
- Parking notes show under Client details whenever you book this client, for example "Park on the road, the drive is narrow."
- Key code is stored encrypted; once saved it shows as •••• until someone clicks Show key code, and each look is logged.
Step 4 Choose who books for them
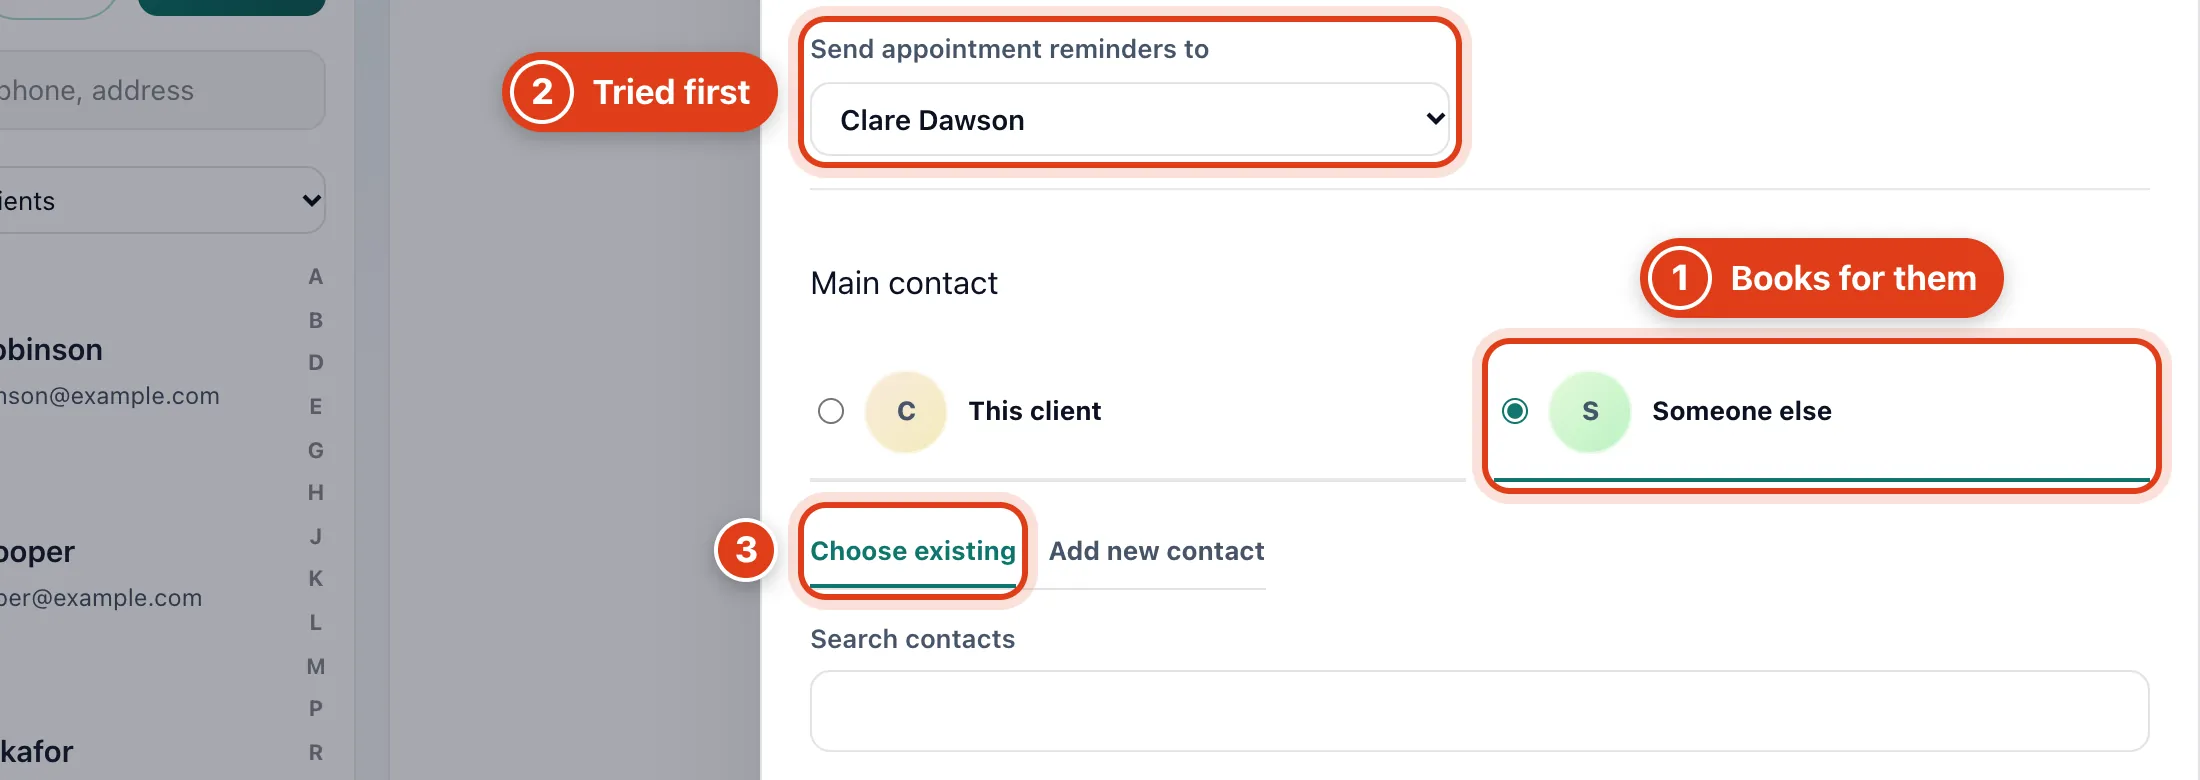
- Someone else: choose it when another person books for the client, like a son or daughter for a parent, or an owner for a pet.
- Send appointment reminders to: whose email or mobile Offlico tries first for reminders; invoices still go to the client. For example, choose Tom Dawson and Clare Dawson's reminders go to Tom first.
- Choose existing lists your clients who are already someone's main contact.
Step 5 Add a new main contact and save
Then Save to add the client with their main contact.
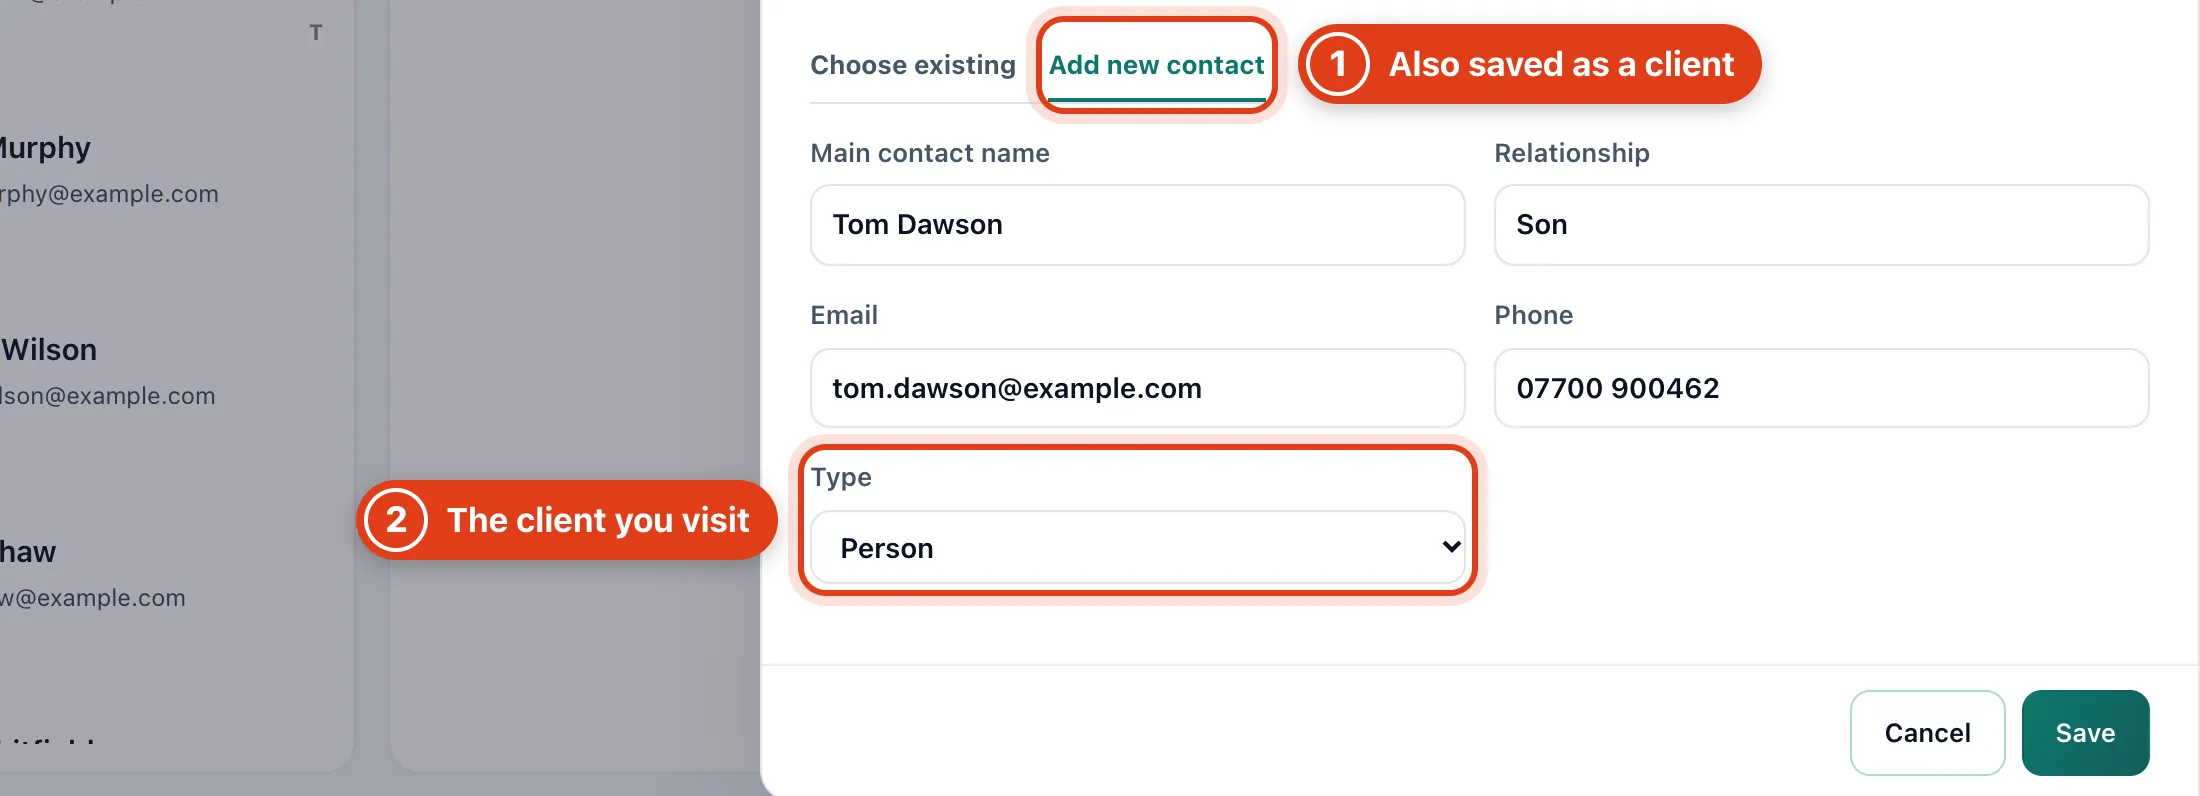
- Add new contact saves the contact as a client too; it needs a name, Relationship, and an email or phone.
- Type describes the client you visit: Animal adds Species and Breed (for example Dog, Labrador), and Child or Animal a date of birth.
Part 2 Use the client page
Step 6 Open the client page
In Clients, search by name, email, phone or address, then click the client. The Notes tab keeps dated notes for your team; the client never sees them.
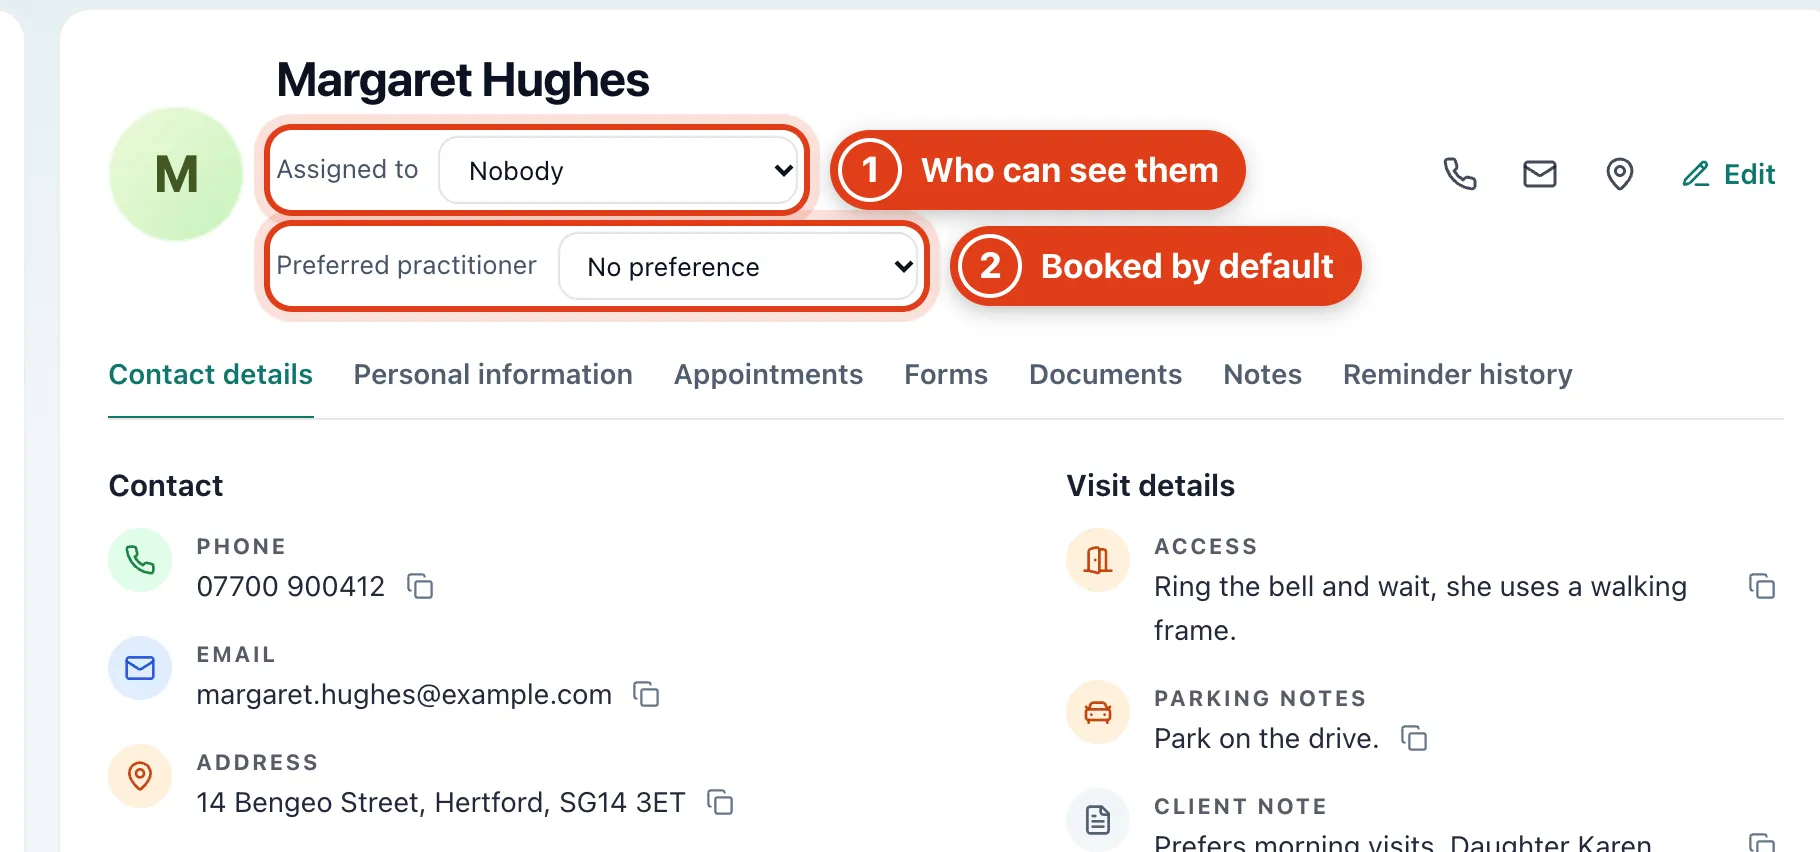
- Assigned to: staff who can't see every client see the ones assigned to them. For example, assign Margaret Hughes to Priya Shah so Priya can open this page.
- Preferred practitioner is filled in as Staff member when you book this client, and given their online bookings when free. For example, Priya Shah for Margaret Hughes.
Step 7 Work on one of their visits
Details opens the visit: see How to change, complete or cancel an appointment.
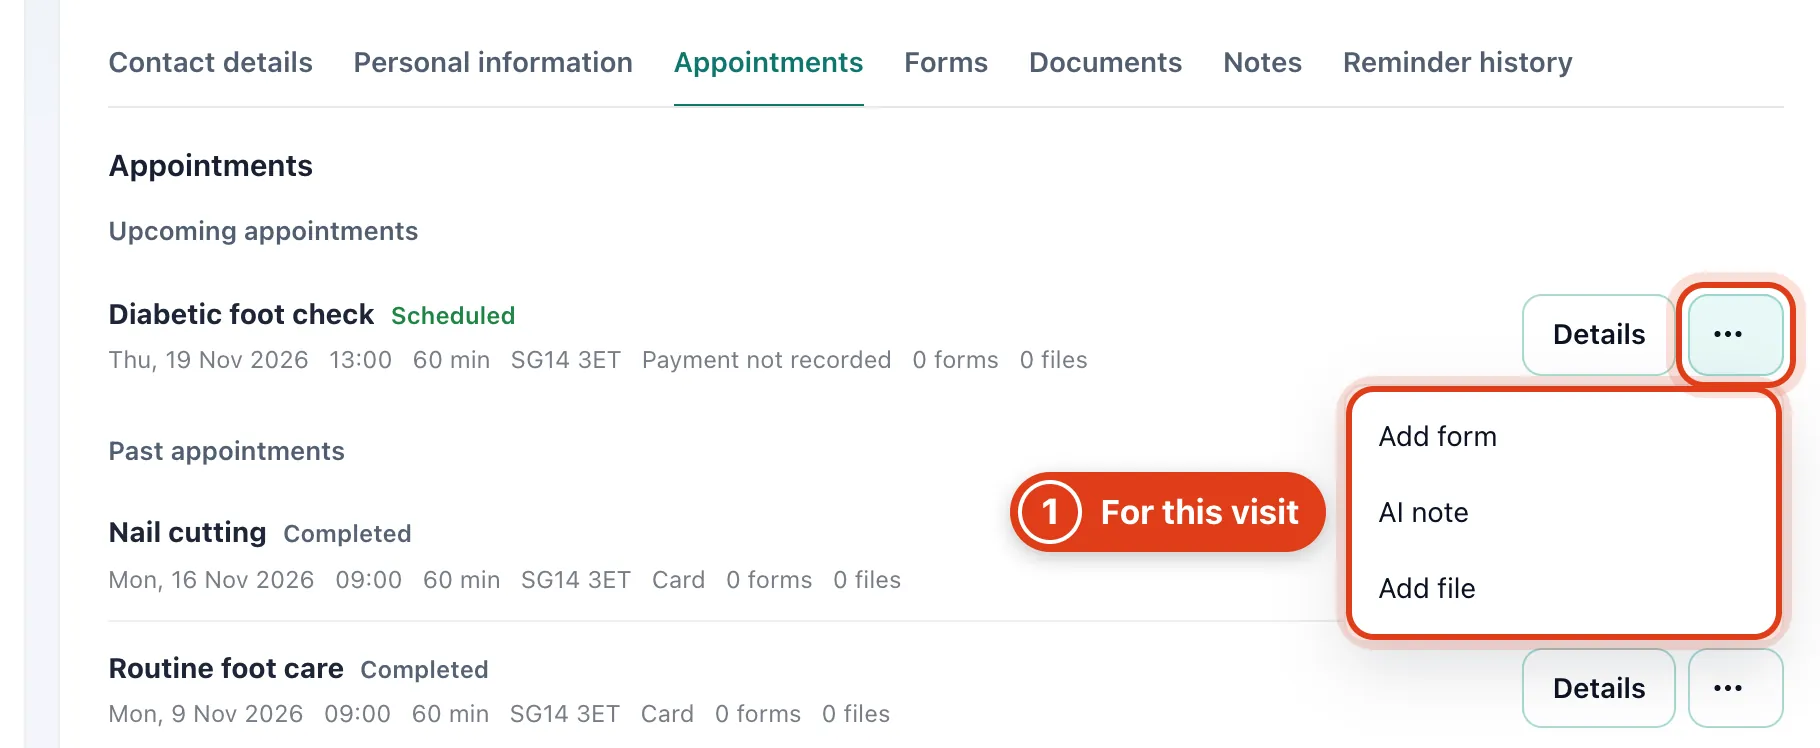
- Add form, AI note and Add file start a form, an AI note or a file that is already linked to that visit.
Step 8 Save a file to their record
Click Documents, then Add file. Once saved, Send to Hub emails the client a link to the file.
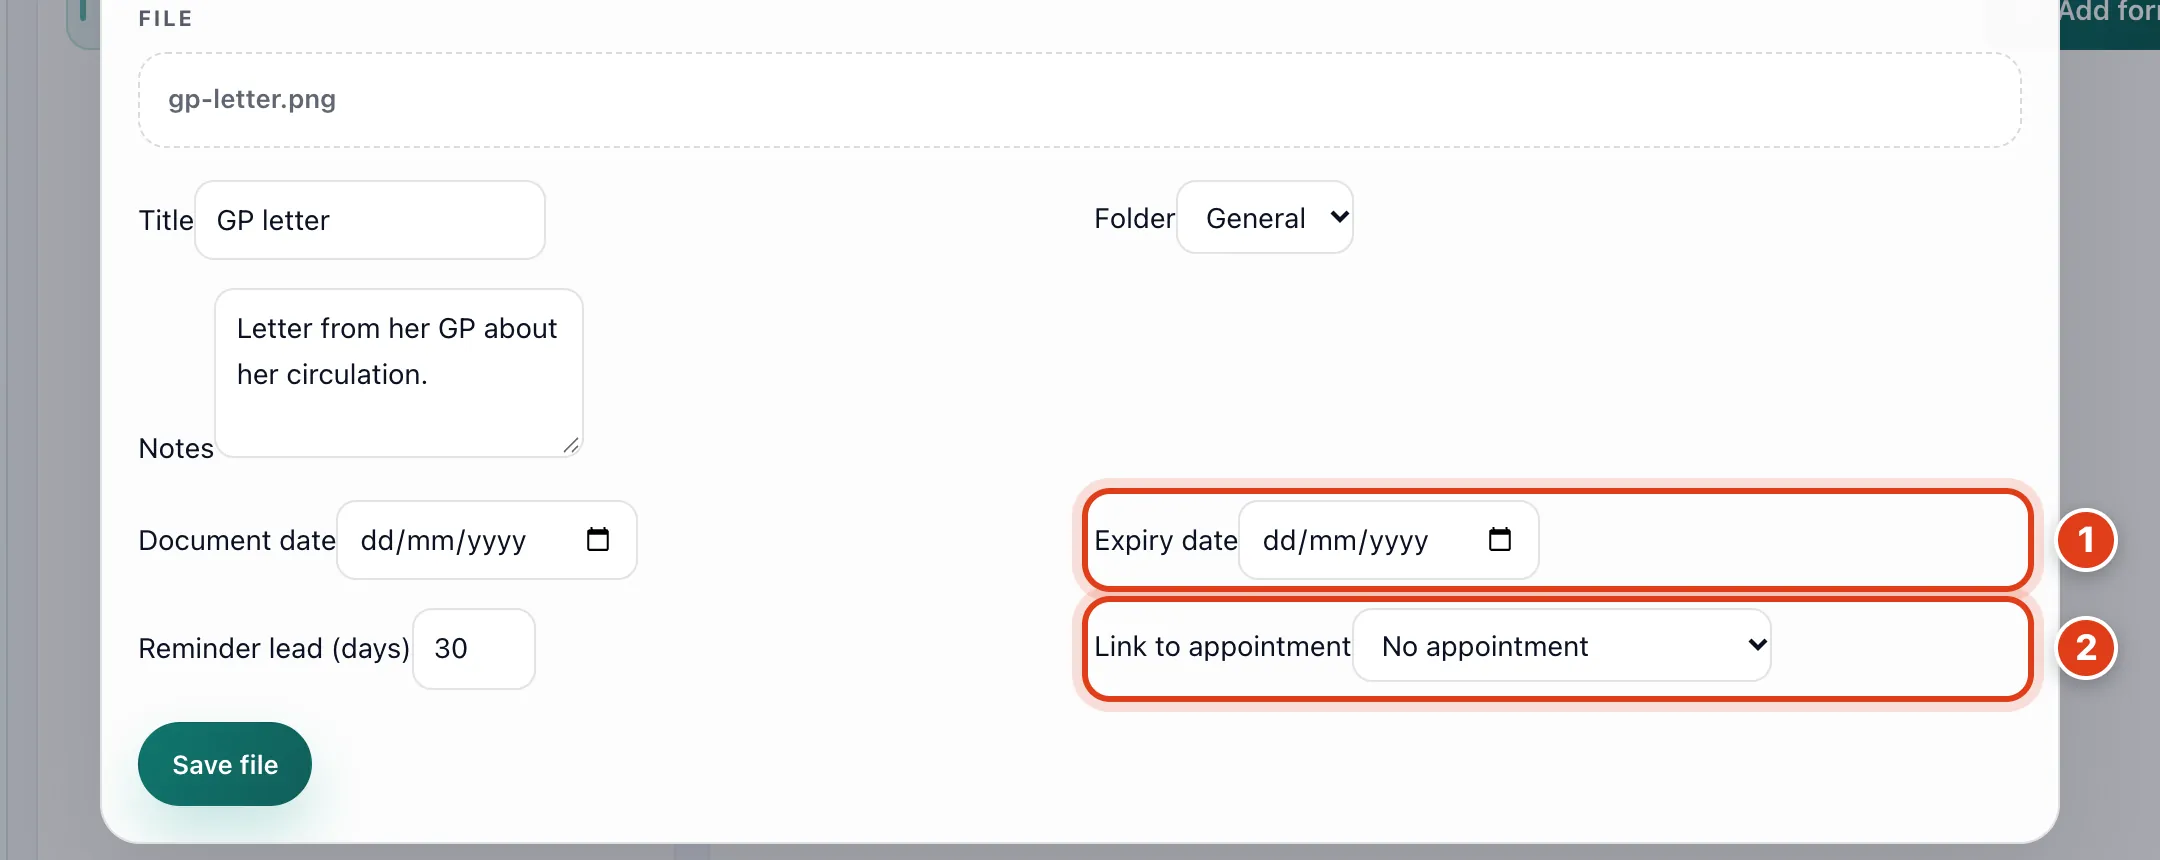
- From the Expiry date the file shows as Expired, and as Expiring soon from the Reminder lead (days) before it. For example, 30 days before 30 June is from 31 May.
- Link to appointment lists the file under that visit's Linked documents.
Part 3 Find and assign clients
Step 9 Assign several clients at once
Click Select, tick the clients, choose who in Assign to, then Assign.
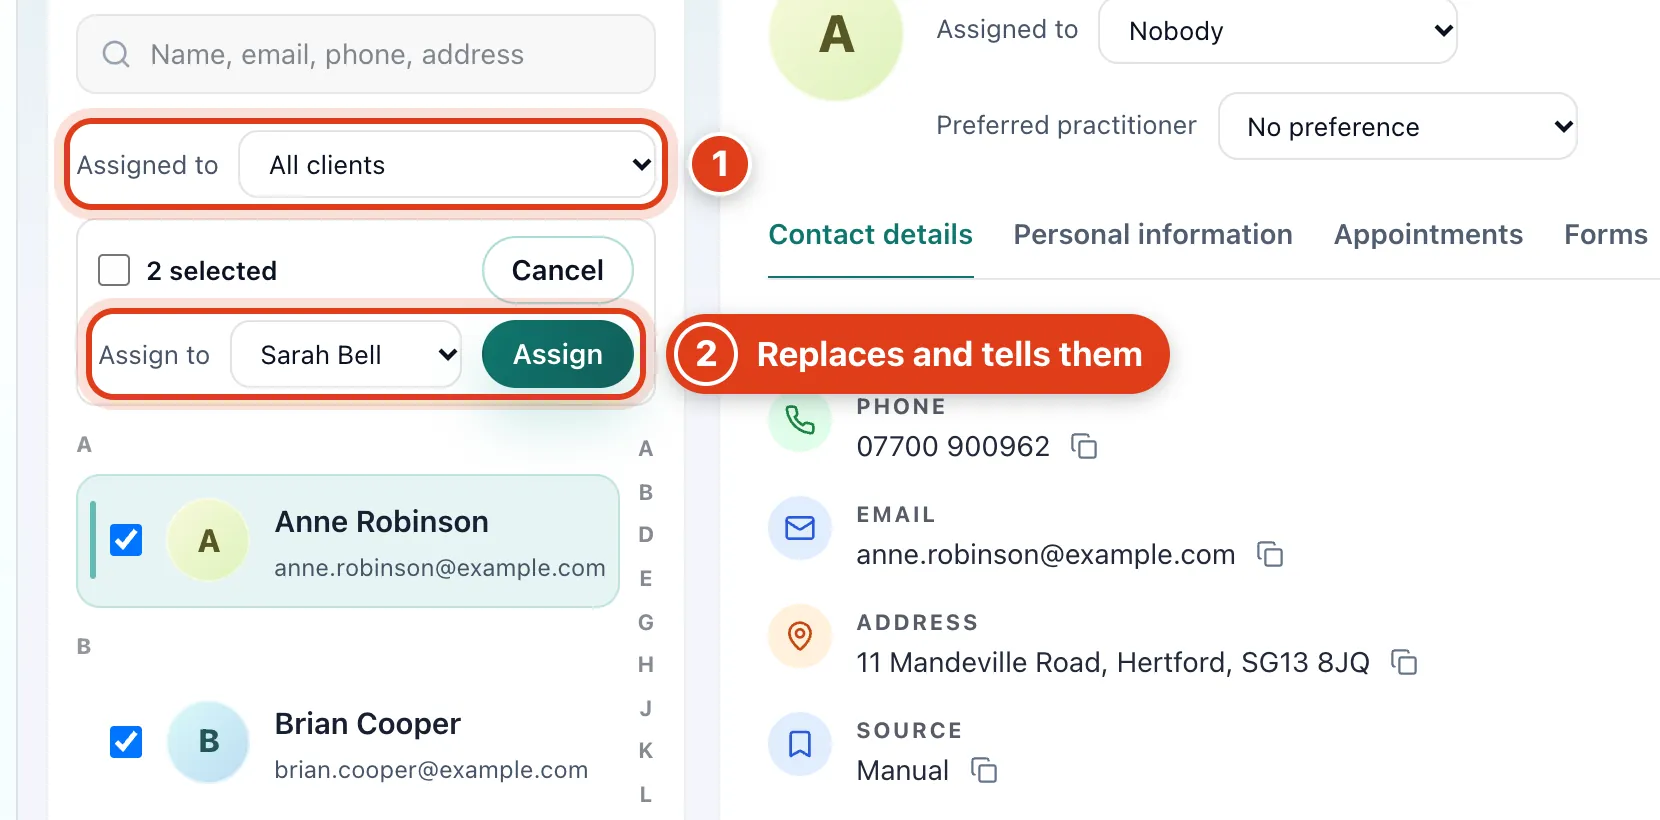
- In Assigned to, Everyone lists clients assigned to the whole team, not all clients; Not assigned lists those with nobody.
- Assign replaces the ticked clients' assignment and tells that person: for example, Anne Robinson and Brian Cooper move to Sarah Bell.
Part 4 Change or delete a client
Step 10 Link family and keep personal details
Click Edit on the client page. To link people, the client needs an email or mobile.
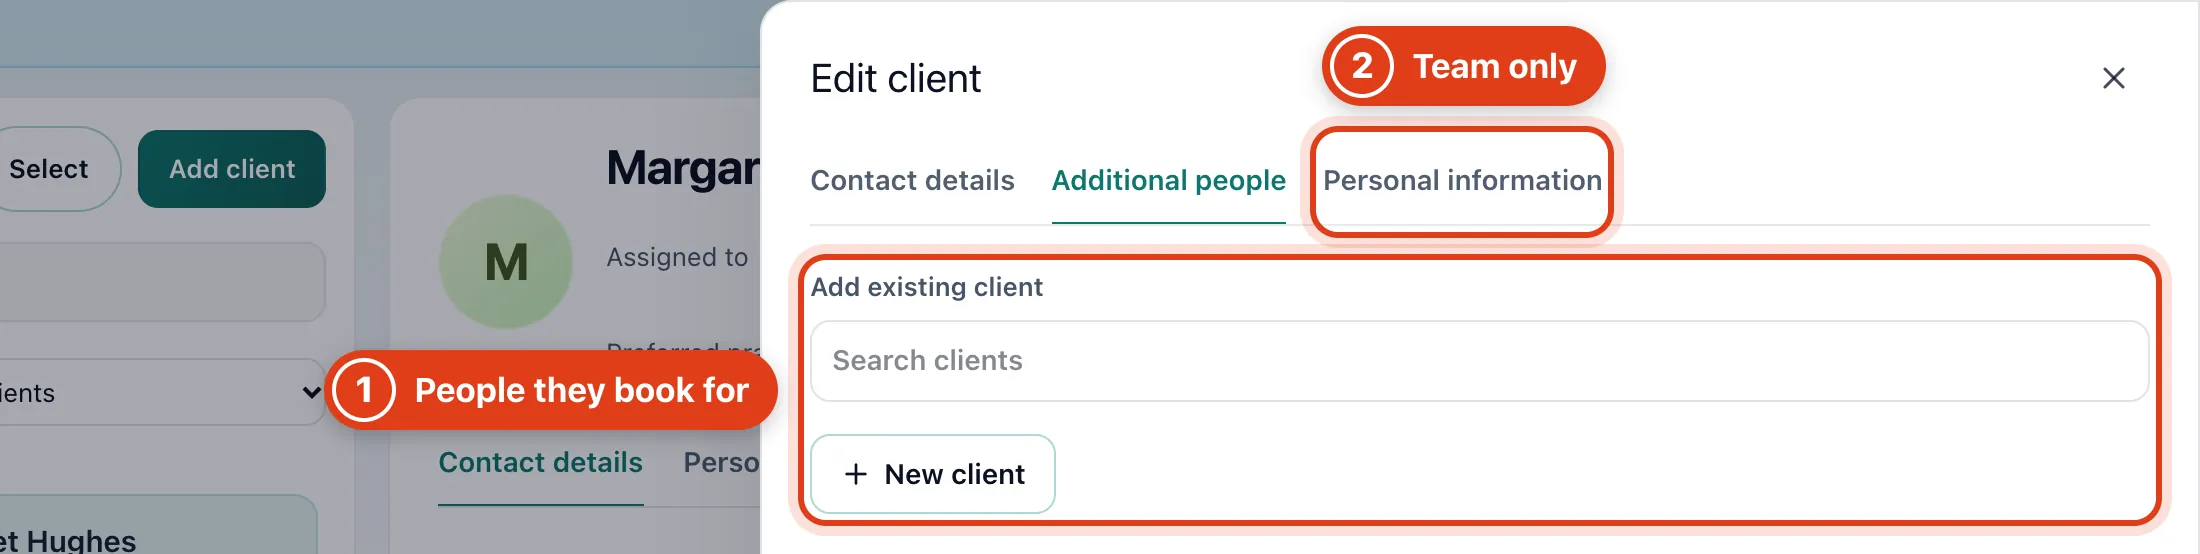
- Additional people: the people this client books for, like a grandchild; add them to the same visit with + when you book.
- Personal information: personal, health and business details and your own Custom questions, such as a shoe size; only your team sees them.
Step 11 Choose who pays, or delete the client
These are at the bottom of Edit client; Assign to someone else sets a main contact, as in step 4.
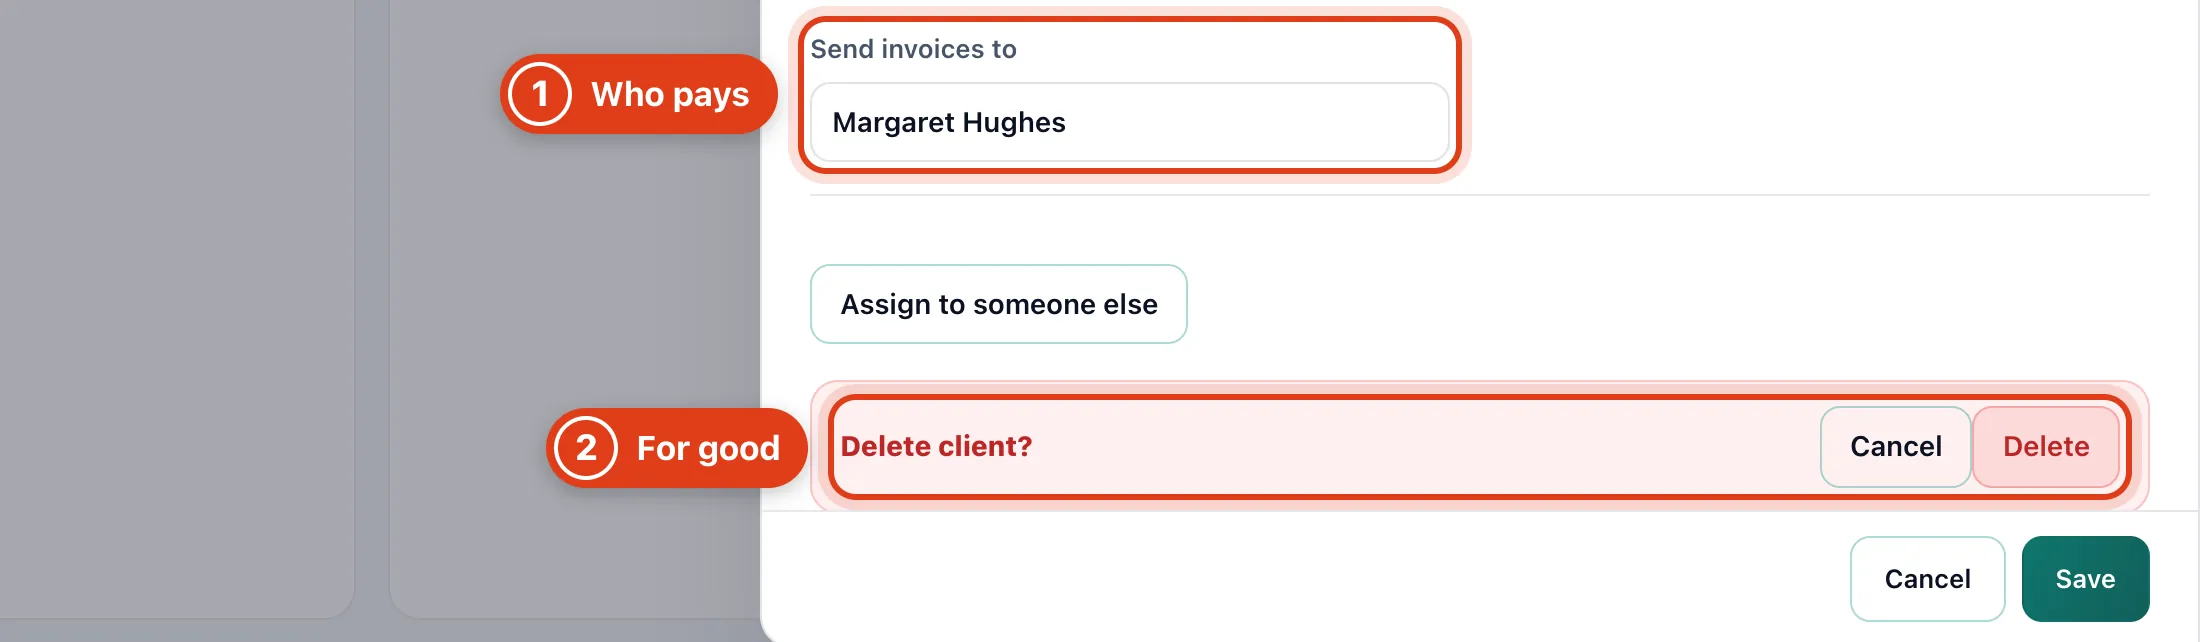
- Send invoices to another client and they get the invoice by email, naming this client under Visit for. For example, Tom Dawson pays for Clare Dawson.
- Delete removes the client, their addresses and files for good; their visits stay in your calendar, future ones too.