
How to use the wait list and classes
Keep a wait list of clients who want a sooner time, and run group classes.
Updated 16 November 2026
Part 1 The wait list
Step 1 Add a client to the wait list
In Calendar, open More › Wait list, click Add to wait list, choose the client and service, then Add.
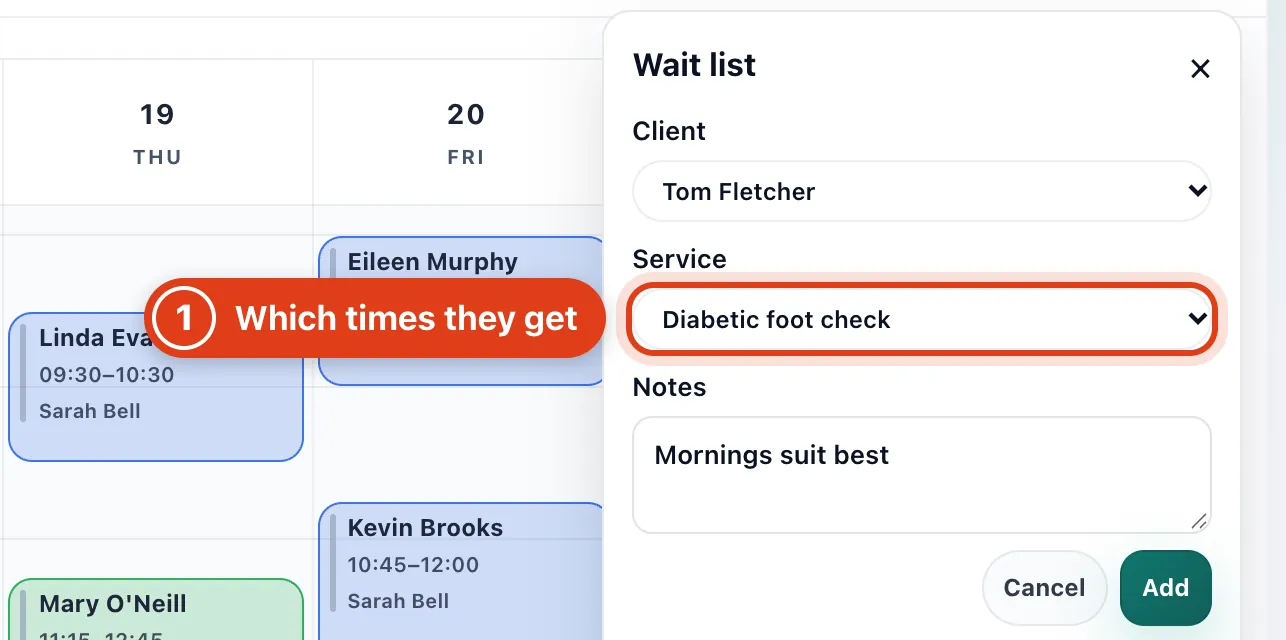
- Service decides which freed times the client is emailed once Waitlist is on (next step): that service's, or every one with No service.
Step 2 Email freed times to your wait list
Go to Settings › Bookings › Confirmations & cancellations and turn on Waitlist; your booking page's Need another time? box then offers Join the waitlist too.
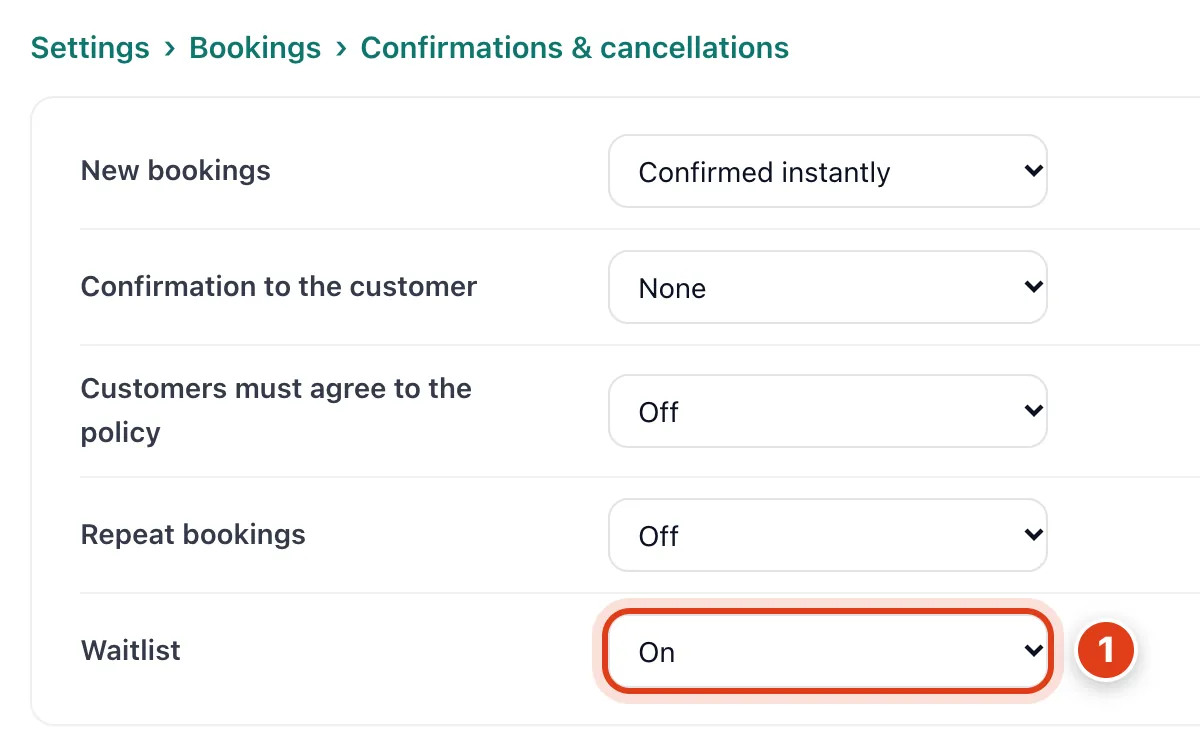
- Waitlist emails a time cancelled at least an hour ahead to all waiting for it; the first to book gets it. For example, a 13:00 Diabetic foot check cancelled at 11:30 is emailed to Tom Fletcher and Eileen Murphy.
Step 3 Book a client from the wait list
When a time frees up, click Book beside the client.
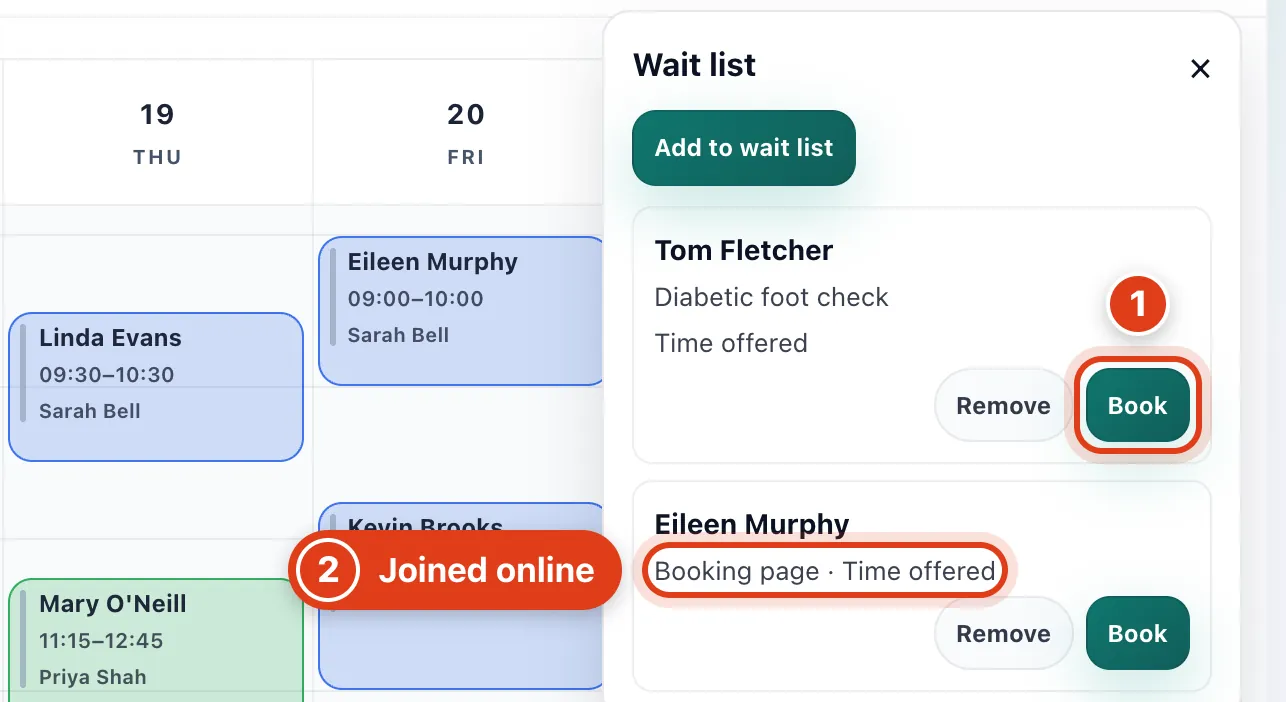
- Book starts the visit on the day the calendar shows at your start time, or today from the next full hour. For example, with the calendar on Thursday it starts at 08:30, and today at 10:15 it starts at 11:00.
- Booking page marks a client who joined from your booking page and Time offered one who has been emailed a freed time; clients who book online leave the list by themselves.
Part 2 Classes
Step 4 Turn a service into a class
Go to Settings › Services & prices, click Edit beside the service, set Class size under More, then Save.
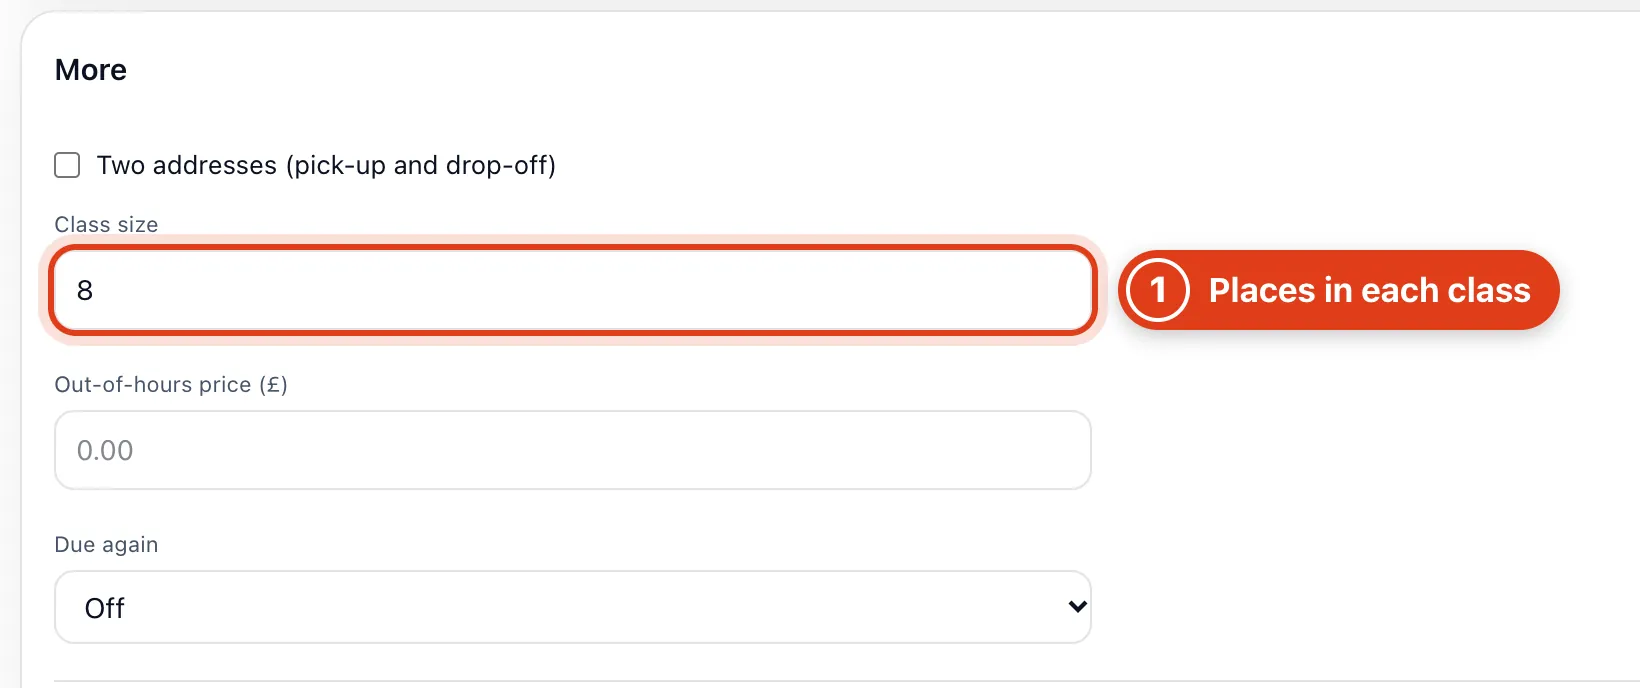
- Class size makes the service a group class: clients book a place in a class you set up instead of a free time, and Classes appears under More in your calendar.
Step 5 Set up a class
In Calendar, open More › Classes, click New class, choose the date and time, then Create.
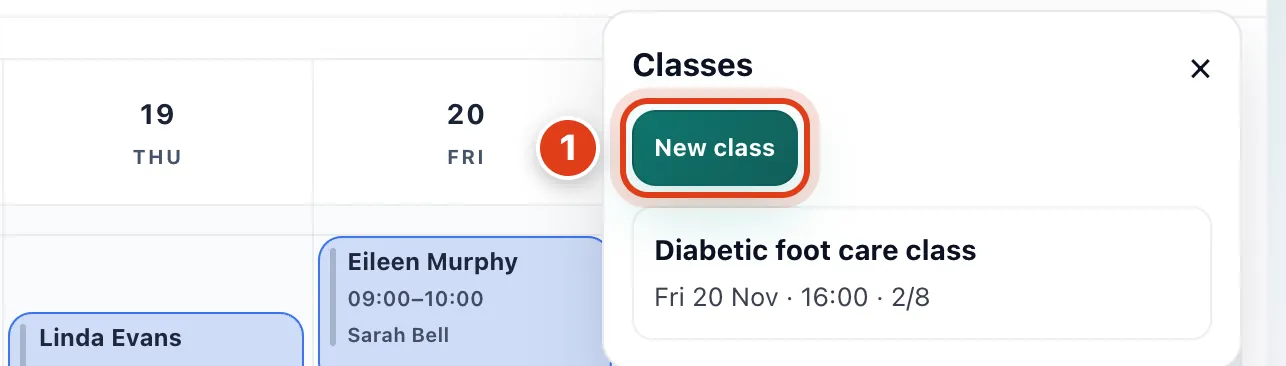
- The class takes that time in your diary once however many book, and the list shows places taken of the class size. For example, Friday's 16:00 class shows 2/8 with Linda Evans and Margaret Hughes booked.
Step 6 Book people on and mark who came
Click a class to see who's booked, choose someone in Add attendee, then Add.
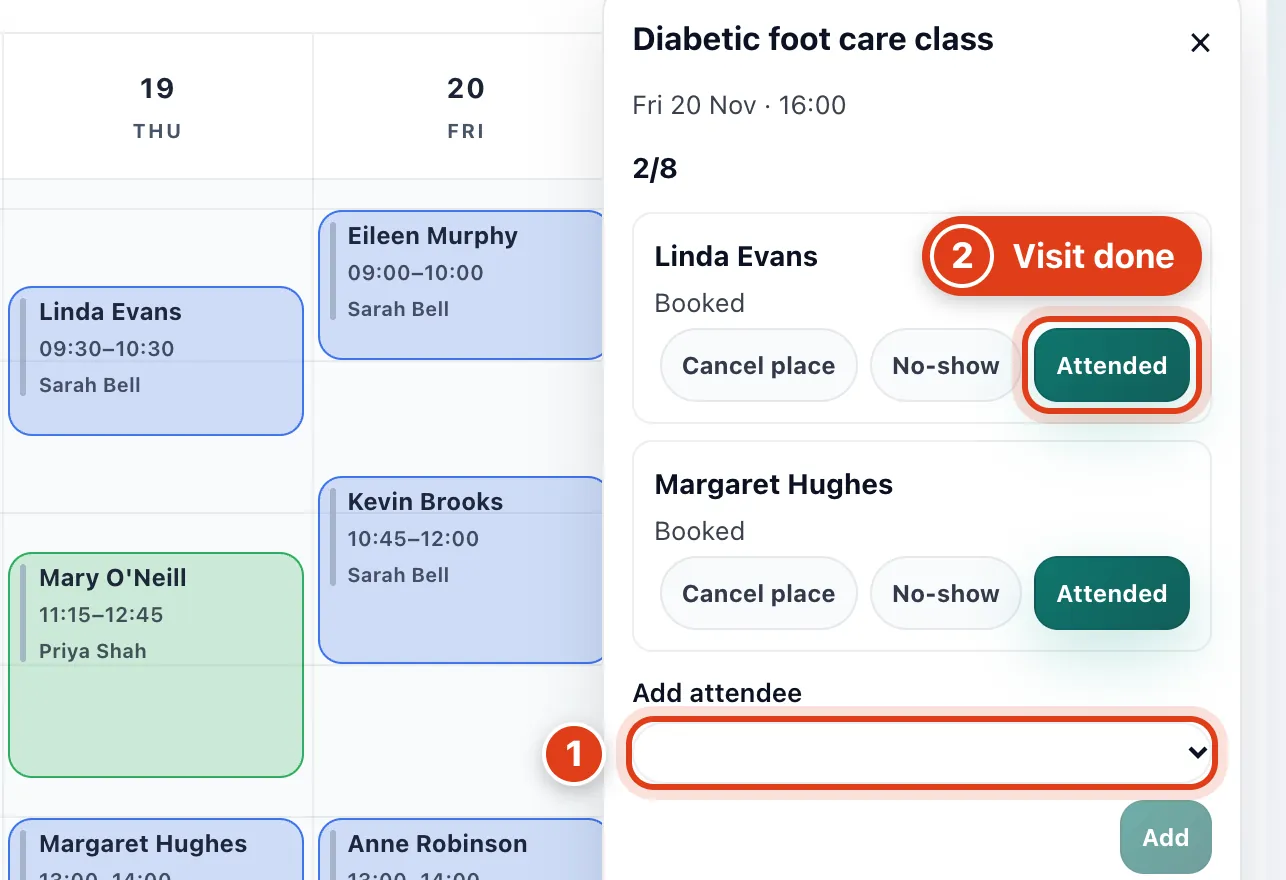
- Each attendee gets a visit of their own, so reminders, payments and an invoice work as for any visit.
- Attended marks that person's visit done like any finished visit. A class can be called off only once nobody is booked: for example, take Linda Evans's and Margaret Hughes's places off Friday's class first.
Step 7 Change the size of one class
Further down, change Class size for this class; it saves as soon as you click elsewhere.
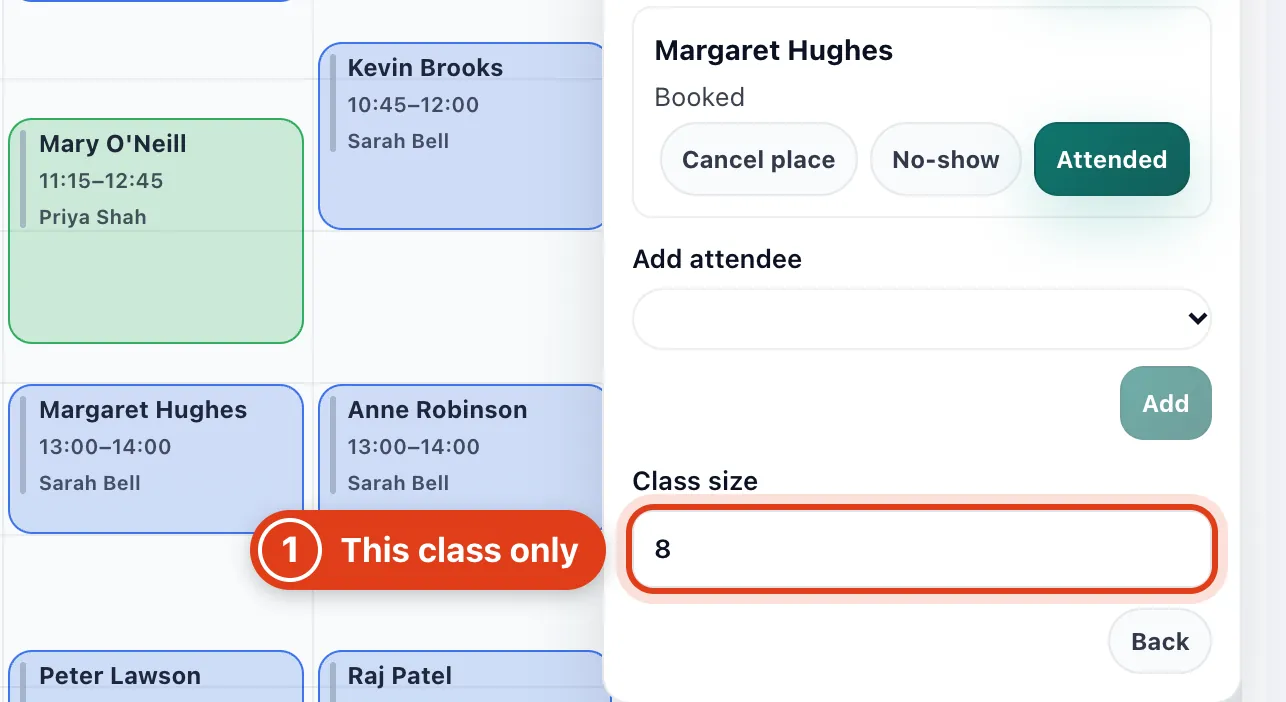
- Class size here changes this class only and can't go below the number booked. For example, Friday's class can't go below 2 while Linda Evans and Margaret Hughes are booked.